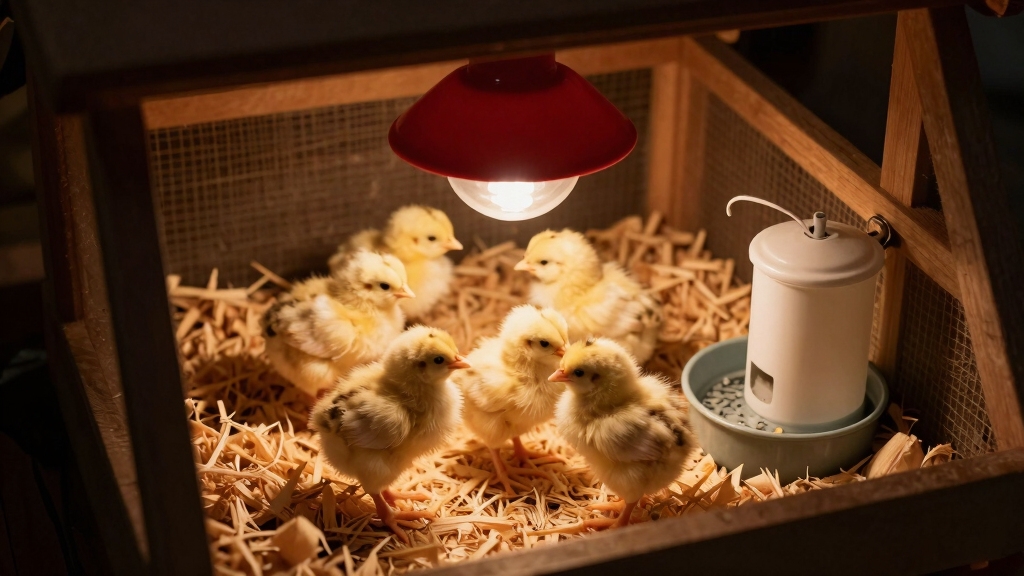
Quick Answer: Start newly hatched chicks at 95°F in the brooder during their first week, then reduce the temperature by 5°F each week until they’re fully feathered at 5-6 weeks old. Monitor chick behavior rather than relying solely on thermometers, comfortable chicks spread out evenly, while cold chicks huddle together and hot chicks pant and move away from the heat source.
Key Takeaways
- Week 1: 95°F is the ideal starting temperature for day-old chicks
- Weekly reduction: Drop brooder temperature by 5°F each week until chicks are fully feathered
- Behavior trumps numbers: Watch how chicks act, not just what the thermometer reads
- Thermometer placement matters: Measure temperature at chick height, not near the ceiling
- Heat sources vary: Heating plates and heat lamps require different management approaches
- Season affects timing: Summer chicks can transition outdoors earlier than winter batches
- Meat birds vs. layers: Fast-growing broilers may need slightly cooler temperatures after week 3
- Full feathering milestone: Most chicks can handle outdoor temperatures without supplemental heat by 5-6 weeks
- Common mistakes: Overheating kills faster than slight chilling, and uniform heat prevents natural temperature regulation
What Temperature Should a Chick Brooder Be at Week 1?
Day-old chicks need a brooder temperature of 95°F during their first week of life. This mimics the warmth they would receive from a mother hen and supports their inability to regulate body temperature effectively.
Position your heat source so chicks can move toward or away from warmth as needed. Create a temperature gradient by placing the heat lamp or heating plate on one side of the brooder, leaving a cooler zone around 75-80°F on the opposite end.
Critical first-week setup tips:
- Measure temperature at chick back height (about 2-3 inches from the floor), not at the heat source
- Preheat the brooder for 24 hours before chicks arrive
- Use a reliable thermometer, cheap models can be off by 10°F or more
- Check temperature in multiple spots to ensure proper gradient
- Avoid drafts near the brooder that can create cold pockets
New chicks are especially vulnerable during the first 48 hours. If they’re too cold, they’ll pile on top of each other (risking suffocation), chirp loudly, and appear lethargic. Slightly warm is safer than slightly cool during week one.
How to Lower Brooder Temperature Each Week for Chicks
Reduce your brooder temperature by 5°F each week starting after the first seven days. This gradual decrease allows chicks to develop their feathering and thermoregulation abilities at a natural pace.
Week-by-week temperature schedule:
- Week 1: 95°F
- Week 2: 90°F
- Week 3: 85°F
- Week 4: 80°F
- Week 5: 75°F
- Week 6+: Room temperature (65-75°F) or outdoor ambient
To lower temperature with a heat lamp, raise it 2-3 inches higher each week. For heating plates, adjust the height setting according to manufacturer instructions. Always make changes gradually, adjust in the evening so chicks can adapt overnight when they’re naturally huddled together.
Choose faster reduction if: Your chicks are feathering quickly, the ambient room temperature is warm (above 70°F), or you’re raising fast-growing meat birds that generate more body heat.
Slow down the schedule if: Chicks appear cold, you’re brooding in winter, the room is drafty, or you have feather-footed breeds that feather more slowly.
Chick Brooder Temperature Chart by Week
Here’s a quick-reference table for managing chick brooder temperature week by week:
| Chick Age | Target Temperature | Heat Lamp Height | What to Watch For |
|---|---|---|---|
| Week 1 (0-7 days) | 95°F | 18 inches | Huddling, loud chirping if cold |
| Week 2 (8-14 days) | 90°F | 21 inches | Wing feathers emerging |
| Week 3 (15-21 days) | 85°F | 24 inches | Body feathers filling in |
| Week 4 (22-28 days) | 80°F | 27 inches | Increased activity, less heat-seeking |
| Week 5 (29-35 days) | 75°F | 30+ inches | Nearly fully feathered |
| Week 6+ (36+ days) | Room temp | Heat off or minimal | Ready for outdoor transition |
This chart assumes standard laying breeds in a room with 65-70°F ambient temperature. Adjust based on your specific conditions and chick behavior. For more guidance on managing chicken health throughout their lifecycle, consider how early care impacts long-term wellness.
What Happens If Brooder Is Too Hot for Baby Chicks?
Overheated chicks will pant with open beaks, spread their wings away from their bodies, and move as far from the heat source as possible. Extreme overheating can cause dehydration, heat stroke, and death, often faster than cold stress.
Signs of overheating:
- Panting and gasping
- Wings held away from body
- Lethargy or lying flat
- Crowding in corners away from heat
- Reduced eating and drinking
- Pale combs (in older chicks)
If you notice these symptoms, immediately raise the heat lamp or turn off supplemental heat. Provide fresh, cool (not cold) water and ensure adequate ventilation. Most chicks recover quickly once temperature is corrected, but severe overheating can cause lasting damage to internal organs.
Common mistake: Using a heat lamp in a small, enclosed brooder without ventilation. Heat builds up rapidly in confined spaces. Always ensure air circulation while preventing drafts at chick level. Understanding proper temperature management helps prevent heat-related issues throughout a chicken’s life.
How Do I Know If My Chicks Are Too Cold or Too Hot?
Comfortable chicks are the best thermometer. They’ll spread out across the brooder, eat and drink normally, chirp contentedly, and sleep peacefully without piling up.
Behavior-based temperature guide:
Too Cold:
- Huddling tightly under heat source
- Loud, distressed chirping
- Piling on top of each other
- Reluctance to move away from heat
- Slow growth and poor feather development
Too Hot:
- Panting with open beaks
- Lying flat with wings spread
- Avoiding the heated area entirely
- Crowding at brooder edges
- Reduced appetite
Just Right:
- Evenly distributed throughout brooder
- Soft, contented chirping
- Active exploration and play
- Regular eating and drinking
- Some chicks under heat, some in cooler zones
Check your chicks several times daily during the first week. Their behavior will tell you more than any thermometer. If you’re unsure, err on the side of slightly warm, chicks can move away from heat but can’t create warmth if they’re cold.
When Can Chicks Go Outside Without a Heat Lamp?
Most chicks can transition outdoors without supplemental heat at 5-6 weeks of age when they’re fully feathered and nighttime temperatures stay consistently above 50°F. Gradual acclimation over 7-10 days reduces stress and allows chicks to adapt to temperature fluctuations.
Factors that determine outdoor readiness:
- Feather coverage: Chicks need complete body feathering, not just wing and tail feathers
- Weather conditions: Stable temperatures above 50°F at night, no extreme weather predicted
- Breed considerations: Hardy breeds (Plymouth Rocks, Wyandottes) adapt faster than delicate breeds (Silkies, Polish)
- Season: Spring and summer chicks transition easier than fall batches
- Coop protection: Insulated, draft-free housing extends the safe temperature range
Start by moving chicks outside during warm afternoons for a few hours, then gradually extend the time. Watch for signs of cold stress (huddling, puffed feathers, reduced activity). If temperatures drop unexpectedly, be prepared to bring them back inside or provide temporary heat.
Choose earlier transition (4-5 weeks) if: You’re raising chicks in late spring or summer, daytime temperatures exceed 75°F, and chicks are well-feathered heritage breeds.
Wait longer (6-8 weeks) if: You’re brooding in fall or winter, nights drop below 45°F, or you have slow-feathering breeds. Similar to how you’d manage seasonal care challenges, timing matters for successful transitions.
Brooder Temperature for 3 Week Old Chicks
Three-week-old chicks need a brooder temperature of 85°F. At this age, chicks have developed significant body feathering and can regulate their temperature much better than newborns, but they still require supplemental heat.
By week three, you’ll notice chicks spending less time directly under the heat source. They’re more active, exploring the brooder, and their wing and back feathers are well-developed. This is a good time to expand brooder space if you haven’t already, growing chicks need room to exercise and develop properly.
Week 3 management tips:
- Ensure at least 1 square foot per chick in the brooder
- Maintain a temperature gradient (85°F warm zone, 70-75°F cool zone)
- Monitor for feather pecking, which increases when chicks are bored or crowded
- Increase ventilation as chicks produce more body heat and waste
- Begin short supervised outdoor visits on warm days (70°F+)
If your three-week-old chicks are panting or avoiding the heat, they’re ready for a cooler environment. Don’t be afraid to drop temperature faster than the standard schedule if chicks show clear signs of comfort at lower temperatures.
What Temperature for 5 Week Old Chicks?
Five-week-old chicks need approximately 75°F in the brooder, though many can handle room temperature (65-70°F) by this age if they’re fully feathered. At five weeks, most standard breeds have complete body feathering and are preparing for outdoor life.
This is typically the final week of supplemental heat for spring and summer chicks. You can begin turning off heat during the day and providing it only at night, then eliminate it entirely if chicks show no signs of cold stress.
Readiness checklist for ending supplemental heat:
- Full body feathering with no bare patches
- Active and alert behavior at room temperature
- No huddling or distress chirping when heat is off
- Ambient temperature stays above 65°F
- Chicks are eating and drinking normally
Common mistake at week 5: Removing heat too abruptly. Even well-feathered chicks benefit from a gradual transition. Turn heat off for a few hours, then a full day, then just provide it at night before eliminating it completely.
For winter chicks, you may need to continue supplemental heat through week 6 or 7, especially if your coop isn’t insulated. The goal is comfort, not rushing them outdoors.
Do I Need a Thermometer in My Chick Brooder?
Yes, you need a reliable thermometer in your chick brooder, but chick behavior is equally important for monitoring temperature. Place the thermometer at chick height (2-3 inches from the floor) in the warm zone, not near the ceiling or directly under the heat source where readings will be inaccurate.
Best thermometer practices:
- Use a digital thermometer with a probe for accurate readings
- Place it where chicks spend most of their time
- Check calibration by testing in ice water (should read 32°F)
- Have a backup thermometer to verify readings
- Monitor both warm and cool zones
Why behavior matters more than numbers: Brooder conditions vary based on room temperature, humidity, ventilation, and heat source type. A thermometer reading 95°F doesn’t account for drafts, uneven heat distribution, or individual chick needs. Some chicks run warmer than others.
Use the thermometer as a starting point and guide, but always prioritize what your chicks are telling you through their behavior. If the thermometer says 95°F but chicks are panting and avoiding the area, the effective temperature is too high.
Can I Use a Heating Plate Instead of Heat Lamp for Brooder Temperature?
Yes, heating plates (also called brooder plates) are an excellent alternative to heat lamps and many chicken keepers prefer them for safety and chick comfort. Heating plates mimic a mother hen by providing overhead warmth that chicks can move under and away from as needed.
Heating plate advantages:
- Significantly lower fire risk than heat lamps
- Lower electricity costs (15-25 watts vs. 250 watts)
- Chicks learn natural day/night cycles (no constant light)
- Adjustable height for easy temperature control
- Encourages natural roosting behavior
Heating plate considerations:
- Higher upfront cost ($40-80 vs. $15-25 for lamp setup)
- Chicks may take 24-48 hours to learn to use it
- Requires proper sizing (follow manufacturer’s chick capacity)
- Less effective in very cold rooms (below 50°F ambient)
To use a heating plate, start with it set low enough that chicks can stand comfortably underneath. Raise it gradually as chicks grow, following the same 5°F per week temperature reduction schedule. Most plates have adjustable legs for easy height changes.
Choose a heating plate if: Fire safety is a concern, you want lower energy costs, or you’re brooding in a living space where constant light is disruptive. For more information on alternative heating methods, explore options that suit your setup.
Difference Between Brooder Temperature for Meat Birds vs Layers
Fast-growing meat birds (broilers) generate more body heat than laying breeds and typically need slightly cooler temperatures after week 2. Start broilers at the same 95°F as layers, but consider reducing temperature by 5-7°F per week instead of the standard 5°F, especially after week 3.
Meat bird temperature adjustments:
- Week 1: 95°F (same as layers)
- Week 2: 88-90°F (slightly cooler than layers)
- Week 3: 80-85°F (broilers generate significant body heat)
- Week 4+: 70-75°F (many broilers need minimal supplemental heat)
Broilers (Cornish Cross and similar hybrids) grow so rapidly that they produce substantial metabolic heat. Overheating is a serious risk, especially in weeks 3-6. Watch for panting, leg problems, and sudden death syndrome, all can be exacerbated by excessive heat.
Layer breeds (Leghorns, Rhode Island Reds, Australorps) follow the standard temperature schedule and generally tolerate a wider temperature range. They feather more slowly than broilers but are hardier overall.
Choose faster cooling for meat birds if: They’re panting, growing exceptionally fast, or the ambient room temperature is above 70°F. Proper temperature management improves leg health and reduces mortality in fast-growing breeds.
Common Mistakes with Chick Brooder Temperature
The most common brooder temperature mistake is creating uniform heat throughout the entire brooder, which prevents chicks from self-regulating their temperature. Always maintain a temperature gradient with warm and cool zones.
Top temperature mistakes to avoid:
1. No temperature gradient
- Problem: Chicks can’t escape heat or find warmth as needed
- Solution: Heat only one side or corner of the brooder
2. Measuring temperature at the wrong height
- Problem: Thermometer near ceiling reads 95°F while chicks experience 85°F
- Solution: Place thermometer at chick back height (2-3 inches up)
3. Removing heat too quickly
- Problem: Chicks develop respiratory issues or fail to thrive
- Solution: Follow the 5°F per week schedule unless chicks clearly indicate readiness for faster reduction
4. Ignoring behavior in favor of thermometer readings
- Problem: Chicks suffer while thermometer shows “correct” temperature
- Solution: Watch chick behavior first, adjust temperature accordingly
5. Using undersized or oversized heat sources
- Problem: Can’t maintain proper temperature or creates dangerous hot spots
- Solution: Match heat source capacity to brooder size (250-watt lamp for 25-30 chicks)
6. Poor ventilation while maintaining heat
- Problem: Ammonia buildup and respiratory disease
- Solution: Ensure air circulation without creating drafts at chick level
7. No backup heat source
- Problem: Bulb burns out overnight, chicks chill or die
- Solution: Keep spare bulbs on hand or use two lower-wattage lamps
Understanding these mistakes helps you provide consistent, appropriate warmth throughout the brooding period. Just as you’d carefully manage chicken health issues in adult birds, proper early care prevents problems later.
Brooder Temperature in Summer vs Winter
Summer brooding requires less supplemental heat and allows earlier outdoor transitions, while winter brooding demands careful temperature management and extended heat provision. Ambient room temperature dramatically affects how you manage brooder heat.
Summer brooding (room temp 75-85°F):
- Heat lamp may only be needed at night after week 2
- Chicks can transition outdoors at 4-5 weeks
- Focus on preventing overheating rather than maintaining warmth
- Ensure adequate ventilation and shade
- Watch for heat stress on hot days (90°F+)
Winter brooding (room temp 50-65°F):
- Supplemental heat needed 24/7 through week 5-6
- Outdoor transition delayed until 6-8 weeks
- Insulate brooder to retain heat
- Prevent drafts while maintaining air quality
- May need higher-wattage heat source
Spring and fall brooding falls between these extremes. Start with standard temperature guidelines and adjust based on daily conditions. Be prepared for temperature swings, a warm spring day followed by a cold night can stress chicks if you’ve removed heat too early.
Choose your brooding season wisely: Spring (March-May) offers the easiest conditions for beginners, with moderate temperatures and natural warming trends. Winter brooding is more challenging but possible with proper setup. For guidance on seasonal chicken care, consider how timing affects management throughout the year.
When to Stop Providing Heat for Growing Chicks
Stop providing supplemental heat when chicks are fully feathered (typically 5-6 weeks old), can maintain normal behavior at room temperature, and nighttime temperatures stay consistently above 50°F. The transition should be gradual over several days to prevent stress.
Step-by-step heat removal process:
Day 1-2: Turn heat off during the warmest part of the day (noon-4 PM)
Day 3-4: Extend heat-off period to 6-8 hours during daytime
Day 5-6: Provide heat only at night
Day 7+: Monitor chicks without heat; reinstate only if they show cold stress
Signs chicks are ready to go without heat:
- Complete feathering with no down visible
- Active and vocal at room temperature
- No huddling when heat is off
- Normal eating, drinking, and playing
- Age 5+ weeks for standard breeds
Signs to continue providing heat:
- Huddling or piling when heat is off
- Reduced activity or lethargy
- Distressed chirping
- Puffed-up appearance
- Temperatures below 50°F at night
Emergency heat reinstatement: If you’ve removed heat but weather turns unexpectedly cold, don’t hesitate to provide temporary warmth. A sudden cold snap can stress even well-feathered chicks. Better to provide unnecessary heat for a few days than risk chilling your flock.
Once chicks are in their outdoor coop without supplemental heat, monitor them during the first cold night. Check that they’re roosting together for warmth and not showing signs of distress. Most fully feathered chicks adapt quickly to outdoor temperatures, especially when they have proper shelter.
FAQ
What temperature should I start my chicks at?
Start day-old chicks at 95°F in the brooder. This temperature mimics the warmth of a mother hen and supports chicks that cannot yet regulate their own body temperature effectively.
How much should I lower the brooder temperature each week?
Reduce brooder temperature by 5°F each week after the first seven days. This gradual decrease allows chicks to develop feathering and thermoregulation naturally without stress.
Can chicks survive if the brooder gets too cold at night?
Chicks can die from cold stress if temperatures drop significantly, especially during the first two weeks. Always have a backup heat source and check chicks before bed to ensure they’re warm and comfortable.
Do I need a thermometer or can I just watch chick behavior?
Use both. A thermometer provides a baseline, but chick behavior is the ultimate indicator of comfort. Comfortable chicks spread out evenly, while cold chicks huddle and hot chicks pant.
When can I turn off the heat lamp completely?
Turn off supplemental heat when chicks are fully feathered (5-6 weeks), show no cold stress at room temperature, and outdoor nighttime temperatures stay above 50°F consistently.
Is a heating plate better than a heat lamp?
Heating plates are safer (lower fire risk), more energy-efficient, and allow natural day/night cycles. Heat lamps are cheaper initially and work better in very cold conditions. Both work well when used properly.
What if my chicks are panting under the heat lamp?
Panting indicates overheating. Immediately raise the heat lamp 3-4 inches, ensure adequate ventilation, and provide fresh water. Chicks should stop panting within 15-30 minutes once temperature is corrected.
Can I brood different ages of chicks together?
Avoid brooding chicks of different ages together unless the age gap is less than one week. Older chicks need cooler temperatures and may bully younger ones, while younger chicks need warmer conditions.
How do I know if my brooder is too hot?
A too-hot brooder causes chicks to pant with open beaks, spread wings away from their bodies, crowd in corners away from heat, and show reduced appetite and activity.
What temperature do 4-week-old chicks need?
Four-week-old chicks need approximately 80°F in the brooder. By this age, most chicks have substantial feathering and can tolerate cooler temperatures for short periods.
Should I use a red or white heat bulb?
Red bulbs reduce feather pecking and allow chicks to sleep more naturally, while white bulbs provide better visibility for monitoring chick health. Both maintain temperature equally well.
How cold is too cold for fully feathered chicks?
Fully feathered chicks (6+ weeks) can handle temperatures down to 40-45°F if they have shelter and can huddle together. Below 40°F, consider providing supplemental heat or ensuring excellent coop insulation.
Conclusion
Managing chick brooder temperature week by week is straightforward when you combine thermometer readings with careful observation of chick behavior. Start your day-old chicks at 95°F, reduce temperature by 5°F each week, and watch how your chicks respond. Comfortable chicks spread out evenly, eat well, and chirp contentedly, they’re your best indicator that temperature is correct.
Remember that the standard temperature schedule is a guideline, not a rigid rule. Season, breed, room conditions, and individual chick development all influence when to adjust heat. Summer chicks may need minimal supplemental heat after week 3, while winter chicks might require warmth through week 7. Trust your observations and adjust accordingly.
Your next steps:
- Set up your brooder with a reliable thermometer at chick height
- Create a temperature gradient with warm and cool zones
- Check chicks multiple times daily during the first week
- Reduce temperature by 5°F weekly, adjusting based on behavior
- Begin outdoor acclimation when chicks are fully feathered and weather permits
- Keep a backup heat source on hand for emergencies
By following these chick brooder temperature guidelines week by week and staying attentive to your flock’s needs, you’ll raise healthy, thriving chickens ready for a productive life in your backyard. The effort you invest in proper brooding pays dividends in bird health, growth rates, and long-term flock success.