
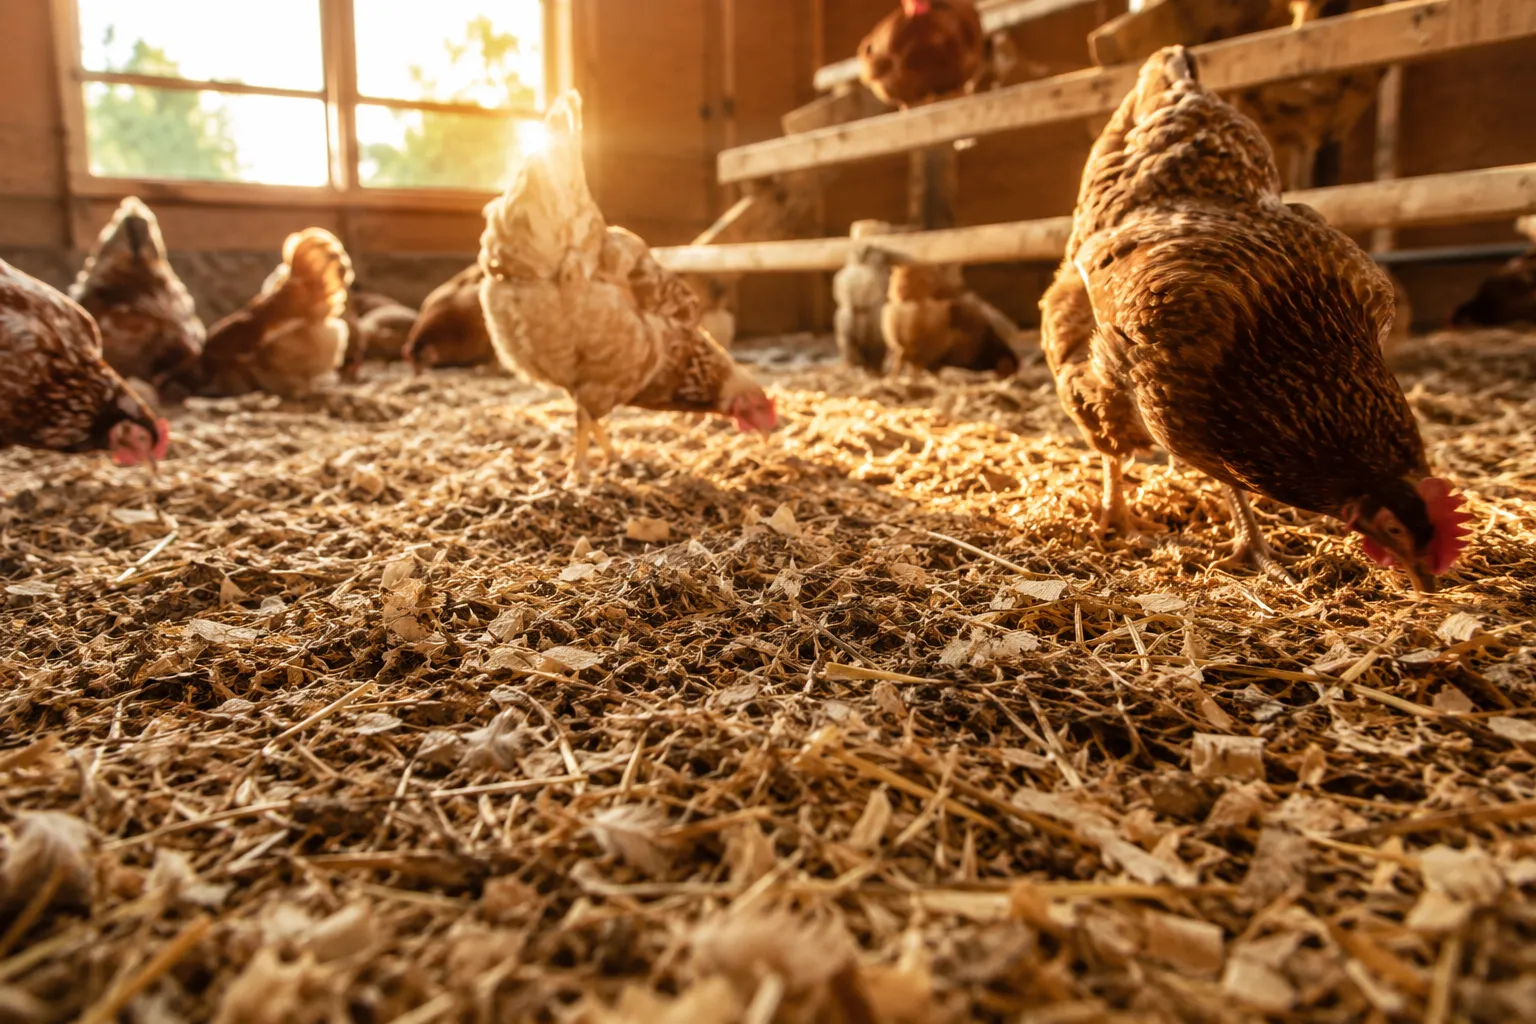
Quick Answer: The deep litter method is a low-maintenance chicken coop bedding system where you continuously add fresh bedding material on top of existing layers instead of removing it regularly, allowing the bottom layers to compost naturally over months. This creates a thick, multi-layered floor (typically 6-12 inches deep) that generates heat through decomposition, reduces cleaning frequency, and produces nutrient-rich compost for your garden.
Key Takeaways
- The deep litter method involves layering fresh bedding on top of old material, allowing it to compost in place over 6-12 months
- Best bedding materials include pine shavings, hemp bedding, and chopped straw (avoid cedar, which is toxic to chickens)
- This method reduces coop cleaning to 1-2 times per year instead of weekly or monthly cleanings
- The composting process generates beneficial heat during winter months, helping keep chickens warm
- Proper ventilation is essential to prevent ammonia buildup and moisture problems
- Deep litter works best in coops with at least 3-4 square feet per bird and good airflow
- When managed correctly, the method does not smell bad and actually controls odors better than thin bedding
- Common mistakes include inadequate ventilation, starting with wet bedding, or using it in damp climates without proper drainage
What Is the Deep Litter Method for Chickens?
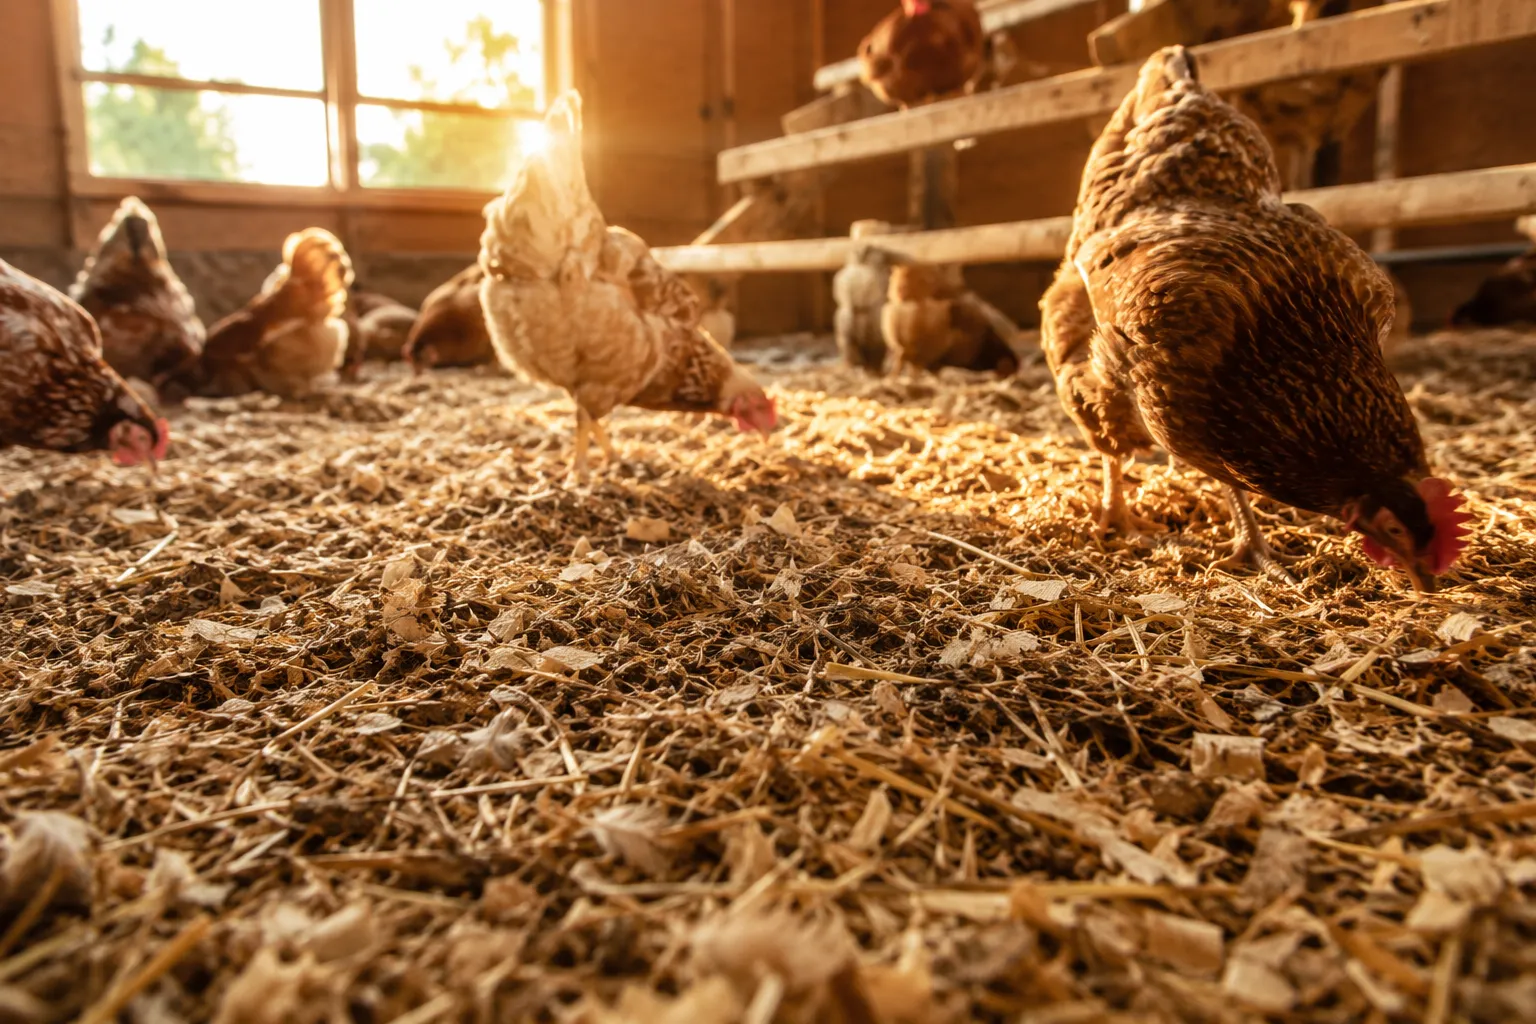
The deep litter method for chickens is a bedding management system where you build up layers of organic material on the coop floor over several months, creating a composting ecosystem that breaks down waste naturally. Instead of removing soiled bedding weekly, you add fresh layers on top and allow the chickens to turn and aerate the material through their natural scratching behavior.
This approach mimics how chickens would naturally live in a forest environment, scratching through leaf litter and organic debris. The system relies on beneficial microorganisms and bacteria that break down chicken droppings and bedding material, converting them into compost while the chickens are still using the coop.
Key characteristics of a functioning deep litter system:
- Bedding depth ranges from 6 to 12 inches when fully established
- Fresh material is added every 2-4 weeks as the top layer becomes soiled
- The entire bedding is removed only once or twice per year
- Chickens actively participate by scratching and mixing the layers
- The composting process generates warmth (temperatures in lower layers can reach 90-110°F)
The method requires an initial setup period of 2-3 months to establish the composting ecosystem. During this time, you’ll add bedding more frequently until the system reaches its working depth.
How Does Deep Litter Method Work in Chicken Coops?
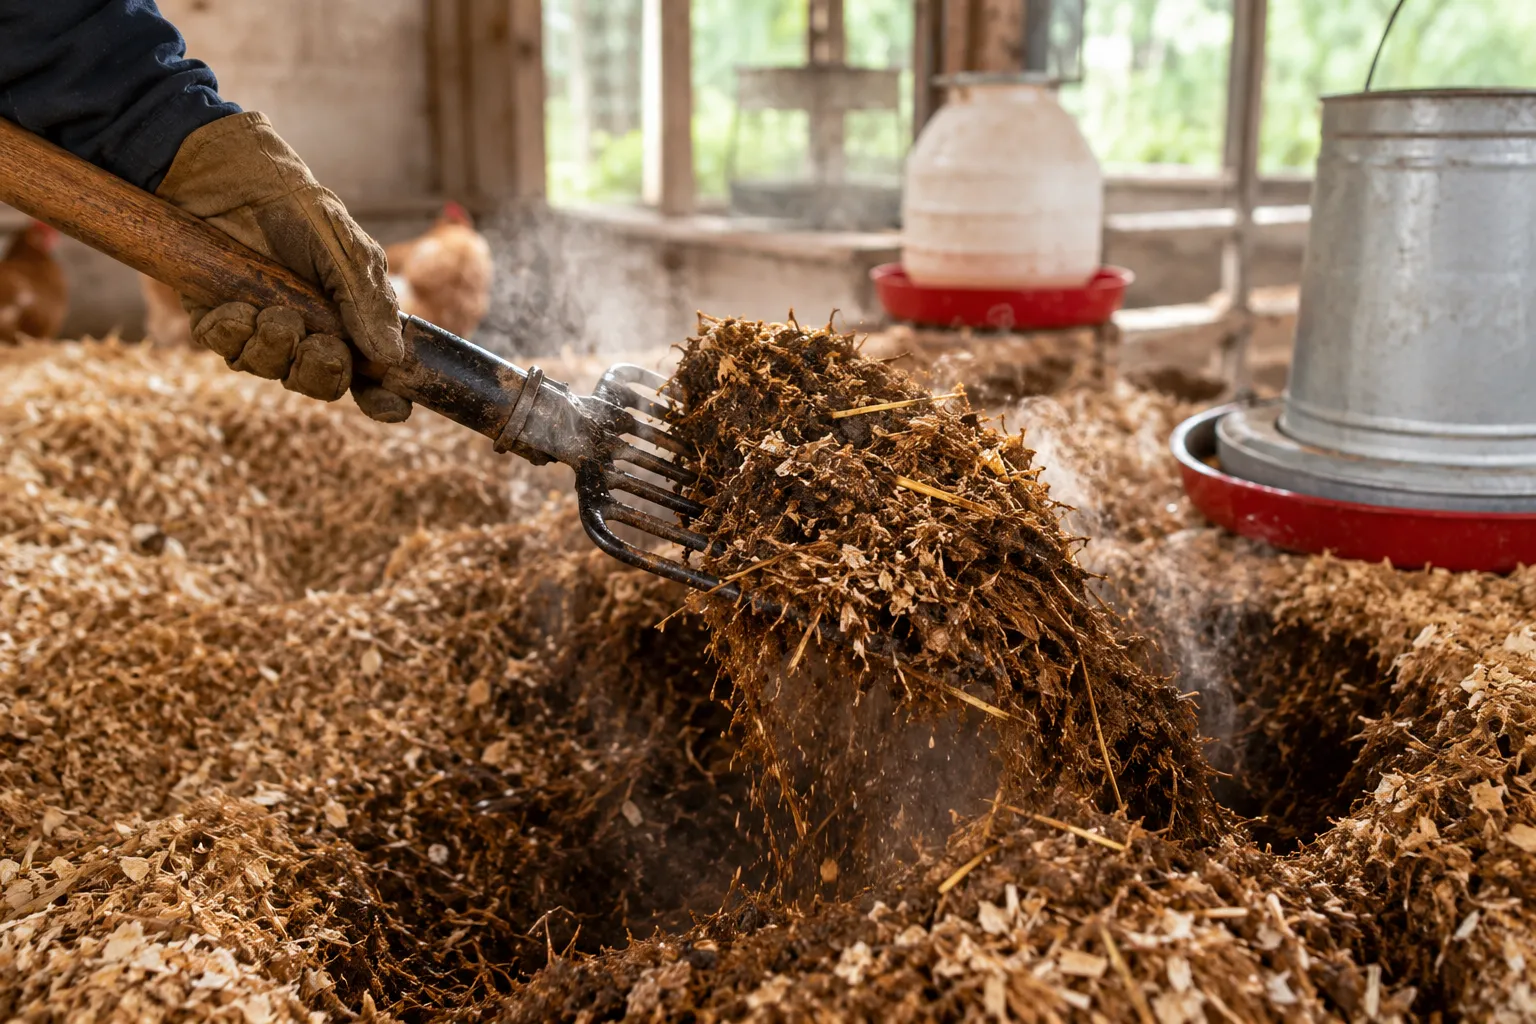
The deep litter method works through a controlled composting process that happens directly on your coop floor. When chickens deposit droppings on the bedding, beneficial bacteria and microorganisms begin breaking down the nitrogen-rich waste along with the carbon-rich bedding material.
Chickens naturally scratch and forage throughout the day, which aerates the bedding and mixes fresh droppings into lower layers. This scratching behavior is crucial because it introduces oxygen into the system, preventing anaerobic decomposition (which causes foul odors) and promoting aerobic composting instead.
The composting cycle works in three layers:
- Top layer (0-2 inches): Fresh, dry bedding where chickens walk and roost; absorbs new droppings
- Middle layer (2-6 inches): Active composting zone where microorganisms break down material; slightly warm to the touch
- Bottom layer (6-12 inches): Mature compost that’s dark, crumbly, and earthy-smelling; nearly finished breaking down
The nitrogen from chicken waste provides the “green” component while the bedding provides the “brown” carbon component, creating the ideal carbon-to-nitrogen ratio for composting (approximately 25:1 to 30:1). This balance prevents ammonia buildup when managed correctly.
Temperature regulation happens naturally as the composting process generates heat. During winter, this can add 5-10°F of warmth to your coop, reducing the energy chickens need to maintain body temperature.
Deep Litter Method vs Regular Bedding Cleaning
Regular bedding cleaning involves removing all or most soiled bedding weekly or bi-weekly and replacing it with fresh material. The deep litter method, by contrast, removes bedding only once or twice annually while continuously adding fresh layers on top.
Comparison of both approaches:
| Factor | Deep Litter Method | Regular Cleaning |
|---|---|---|
| Cleaning frequency | 1-2 times per year | Weekly to monthly |
| Bedding costs | Lower (material stays longer) | Higher (frequent replacement) |
| Time investment | Low ongoing, high at cleanout | Moderate but consistent |
| Compost production | High-quality finished compost | Raw bedding and droppings mix |
| Winter warmth | Generates heat from composting | No heat generation |
| Ammonia control | Good (when ventilated properly) | Good (fresh bedding absorbs) |
| Setup complexity | Requires learning curve | Simple and straightforward |
Regular cleaning works better for small coops (under 16 square feet), coops in very humid climates, or situations where you have limited ventilation. It gives you more control over moisture and allows you to inspect the coop floor regularly for pests or damage.
Choose regular cleaning if you have fewer than 3-4 chickens, live in a consistently damp climate, or prefer the peace of mind that comes with frequent coop inspections. Choose deep litter if you have adequate space, good ventilation, and want to reduce maintenance time while producing garden compost.
How to Start Deep Litter Method in Coop
Starting the deep litter method requires proper preparation and a gradual buildup process. Begin with a completely clean, dry coop floor to prevent mold or pest problems from carrying over into your new system.
Step-by-step startup process:
Clean and prepare: Remove all old bedding, droppings, and debris. Sweep or scrape the floor clean. If the floor is wood, ensure it’s sealed or painted to prevent moisture absorption.
Check ventilation: Confirm you have adequate airflow. You need at least one square foot of ventilation per 10 square feet of floor space, positioned high on walls to allow ammonia to escape without creating drafts on chickens.
Add initial layer: Spread 3-4 inches of dry bedding material evenly across the entire floor. Pine shavings work best for the base layer because they’re absorbent and compost readily.
Establish the system: For the first 2-3 months, add a fresh 1-2 inch layer whenever the top surface looks mostly covered with droppings (typically every 1-2 weeks).
Monitor moisture: The bedding should feel dry and fluffy when you run your hand through the top layer. If it feels damp or clumps together, add more fresh bedding immediately and check for ventilation or water leaks.
Encourage scratching: Scatter scratch grains or treats on the bedding daily to motivate chickens to turn and aerate the material.
Best time to start: Fall or early winter is ideal because the composting heat helps during cold months, and you’ll be ready for a spring cleanout when you want compost for your garden. Avoid starting in mid-summer in hot climates, as the additional heat from composting can make the coop uncomfortable.
The system is fully established when you have 6-8 inches of depth and the bottom layers feel warm and have a dark, earthy appearance. This typically takes 2-3 months from your initial setup.
Best Bedding Material for Deep Litter Method
Pine shavings are the gold standard for deep litter systems because they’re highly absorbent, compost well, and are widely available at reasonable prices. They create a fluffy texture that chickens enjoy scratching through and maintain good airflow within the bedding layers.
Bedding materials ranked by effectiveness:
Excellent choices:
- Pine shavings: Most popular; good absorption, composts well, affordable, readily available
- Hemp bedding: Superior absorption (3-4 times more than pine), excellent odor control, composts quickly, but more expensive
- Aspen shavings: Similar to pine but slightly less absorbent; good alternative if pine isn’t available
Good choices:
- Chopped straw: Works well when mixed with shavings; provides structure but less absorbent alone
- Hardwood shavings: Acceptable but take longer to break down than pine
Avoid these materials:
- Cedar shavings: Toxic to chickens; aromatic oils can cause respiratory problems
- Sawdust alone: Too fine; compacts easily, poor airflow, can cause respiratory irritation
- Hay: Retains too much moisture; promotes mold growth
- Sand: Doesn’t compost; defeats the purpose of the deep litter method
Material mixing strategy: Start with 100% pine or hemp shavings for your base layers. Once established, you can add chopped straw (about 25% of each new layer) to provide variety and structure. The straw gives chickens more interesting material to scratch through while the shavings handle moisture absorption.
Purchase bedding in compressed bales when possible to reduce costs. A standard compressed bale of pine shavings (approximately 8 cubic feet) costs $6-8 and will cover about 32 square feet at 3 inches deep.
Does Deep Litter Method Smell Bad?
A properly managed deep litter system does not smell bad and actually controls odors better than thin bedding that’s changed weekly. The composting process breaks down ammonia and other odor-causing compounds, creating an earthy, forest-floor smell rather than a manure smell.
The key difference is that aerobic composting (with oxygen) produces minimal odor, while anaerobic decomposition (without oxygen) creates the foul ammonia smell people associate with chicken coops. When chickens scratch and turn the bedding daily, they introduce oxygen throughout the layers, maintaining aerobic conditions.
Signs your deep litter smells normal (good):
- Earthy, soil-like smell when you stir the bedding
- Slight sweet smell from composting organic matter
- No ammonia smell that makes your eyes water
- Visitors don’t immediately notice an odor when entering the coop
Warning signs of odor problems:
- Strong ammonia smell that burns your nose or eyes
- Sour or rotten smell when you turn the bedding
- Chickens avoiding certain areas of the coop floor
- Excessive flies or insects attracted to the bedding
If you detect ammonia, the problem is almost always inadequate ventilation or too much moisture. Add fresh dry bedding immediately, increase ventilation, and check for water leaks or spills. The ammonia smell should dissipate within 24-48 hours after addressing these issues.
Some people report a slightly stronger smell during the first month of establishing the system, before the beneficial microorganism population fully develops. This is normal and temporary.
How Often Do You Clean with Deep Litter Method?

With the deep litter method, you perform a complete cleanout only once or twice per year, typically in spring and optionally again in fall. Between these major cleanouts, your only maintenance is adding fresh bedding every 2-4 weeks and doing quick spot-checks.
Maintenance schedule:
Daily (2-3 minutes):
- Scatter scratch grains to encourage chickens to turn bedding
- Quick visual check for wet spots or spills
- Remove any large debris or uneaten food
Every 2-4 weeks (10-15 minutes):
- Add 1-2 inches of fresh bedding across the entire floor
- Break up any compacted areas with a pitchfork
- Check moisture level by feeling the bedding
Every 6-12 months (2-4 hours):
- Complete cleanout: remove all bedding down to the floor
- Inspect floor for damage, pests, or moisture problems
- Start fresh with new base layer
The exact timing of your major cleanout depends on your climate, number of chickens, and coop size. Coops in humid climates or with more chickens per square foot may need cleaning every 6 months, while dry climates with spacious coops can go 12 months or longer.
Best cleanout timing: Spring (March-April) is ideal because you’ll have finished compost ready for garden planting season, and you can start fresh before hot summer weather. If doing two cleanouts annually, add a second one in early fall (September-October) before winter.
The removed bedding is fully composted and ready to use directly in your garden. A typical 8×8 foot coop will yield 15-20 cubic feet of finished compost at each cleanout, enough to amend several garden beds.
Deep Litter Method Gone Wrong: What to Do
When deep litter goes wrong, you’ll typically notice excessive moisture, strong ammonia odor, or chickens developing respiratory issues or dirty feathers. These problems indicate the composting process has shifted from aerobic to anaerobic, or moisture has overwhelmed the system’s absorption capacity.
Common failure scenarios and fixes:
Problem: Strong ammonia smell
- Cause: Inadequate ventilation or bedding too wet
- Fix: Add 2-3 inches of fresh dry bedding immediately. Open additional vents or install ventilation fans. If smell persists after 48 hours, do a complete cleanout and start over with better ventilation.
Problem: Wet, soggy bedding
- Cause: Water leaks, poor drainage, or insufficient bedding depth
- Fix: Identify and fix any leaks from waterers or roof. Remove wet sections and replace with dry bedding. Add extra bedding in high-traffic areas. Consider raising waterers to prevent spills.
Problem: Flies or pests
- Cause: Too much moisture or uneaten food in bedding
- Fix: Add dry bedding and diatomaceous earth (food-grade) to problem areas. Remove food scraps daily. Ensure waterers aren’t leaking. Consider adding beneficial insects like black soldier fly larvae that outcompete pest flies.
Problem: Chickens have dirty feet or feathers
- Cause: Bedding too thin or too wet in roosting areas
- Fix: Add fresh bedding under roosts where droppings concentrate. Consider installing a droppings board under roosts to catch overnight waste before it reaches the deep litter.
When to abandon and restart: If you’ve added fresh bedding and improved ventilation but still have ammonia smell after one week, or if more than 50% of the bedding is wet or compacted, do a complete cleanout. The system has failed and needs a fresh start. This typically happens when the coop lacks adequate ventilation or has a moisture problem that must be fixed before trying deep litter again.
Save any dry, good-smelling bedding from the top layers and use it to seed your new system with beneficial microorganisms.
Is Deep Litter Method Safe for Chickens?
The deep litter method is safe for chickens when managed correctly with proper ventilation, appropriate bedding depth, and regular monitoring. Research and decades of practical use by poultry keepers demonstrate that chickens thrive in well-maintained deep litter systems.
Safety benefits of deep litter:
- Provides insulation from cold floors in winter
- Cushions feet and legs, reducing bumblefoot risk
- Offers natural foraging enrichment that reduces boredom and aggression
- Beneficial bacteria in the composting bedding may support gut health
- Reduces dust compared to frequently disturbed thin bedding
Potential safety concerns to manage:
- Ammonia buildup: Can cause respiratory damage if ventilation is inadequate; monitor by smell and ensure proper airflow
- Mold growth: Can develop in wet bedding; always use dry material and fix moisture sources immediately
- Parasite load: Some worry deep litter harbors parasites, but research shows parasite levels are similar to or lower than regularly cleaned coops when managed properly
- Impacted crop: Chickens eating bedding can cause crop impaction; provide adequate grit and ensure chickens have proper feed access
Who should avoid deep litter:
- Coops with dirt floors in very wet climates (moisture can’t escape)
- Coops with poor ventilation that can’t be improved
- Situations with fewer than 3 square feet per bird (overcrowding prevents proper bedding management)
- Keepers who can’t commit to monitoring and adding fresh bedding regularly
Monitor your chickens’ behavior and health as indicators of system safety. Healthy chickens in a safe deep litter system will actively scratch the bedding, have clean feathers, show no respiratory symptoms (no wheezing, coughing, or nasal discharge), and lay eggs normally.
Deep Litter Method in Winter vs Summer
The deep litter method performs differently across seasons, with winter being when the system provides the most benefits and summer requiring more careful moisture management.
Winter advantages (November-March):
- Composting generates heat, adding 5-10°F of warmth to the coop
- Thick bedding insulates chickens’ feet from frozen floors
- Lower humidity in cold air helps keep bedding dry
- Chickens spend more time indoors scratching, which aerates bedding naturally
- Reduced fly and pest activity
Winter management tips:
- Build bedding to maximum depth (10-12 inches) before winter arrives
- Add fresh layers more frequently since chickens are indoors more
- Ensure ventilation remains open even in cold weather (ammonia is more dangerous than cold)
- Check for ice buildup around waterers that can wet bedding
Summer challenges (June-September):
- Higher humidity makes moisture management more difficult
- Composting heat adds unwanted warmth to the coop
- Increased fly activity if bedding becomes too moist
- Chickens spend more time outdoors, less scratching to aerate bedding
Summer management tips:
- Reduce bedding depth to 6-8 inches to minimize heat generation
- Add fresh bedding more conservatively to avoid excess buildup
- Increase ventilation significantly (open windows, add fans)
- Consider a mid-summer cleanout in very hot, humid climates
- Move waterers outside if possible to reduce indoor moisture
Seasonal transition strategy: Do your major cleanout in early spring (March-April) and start building the system fresh. By winter, you’ll have maximum depth for insulation and heat. In late spring (May), you can either do a second cleanout before summer or simply stop adding bedding and let the depth decrease naturally as material compresses and composts.
Some keepers in extreme climates (very hot and humid summers or very cold winters) use deep litter only seasonally, running it October through April and switching to regular cleaning May through September.
How Thick Should Deep Litter Be?
Deep litter should be 6-12 inches thick when fully established, with 8-10 inches being the ideal depth for most coops. This depth provides enough material for active composting while remaining manageable for chickens to scratch through and for you to maintain.
Depth guidelines by stage:
- Initial setup: Start with 3-4 inches of fresh bedding
- Building phase (months 1-3): Gradually increase to 6-8 inches by adding layers every 1-2 weeks
- Established system (months 4+): Maintain 8-10 inches, adding fresh material as the top becomes soiled
- Winter maximum: Can build to 10-12 inches for extra insulation and heat
- Summer minimum: Can reduce to 6-8 inches to minimize heat generation
Measuring depth: Use a ruler or marked stick to check depth in several locations, as bedding settles unevenly. Measure from the coop floor to the top of the bedding. The depth will vary across the floor, with more buildup under roosts and less in corners.
Bedding that’s too thin (under 6 inches) won’t compost effectively and will become saturated with droppings too quickly. Bedding that’s too thick (over 12 inches) becomes difficult for chickens to scratch through, may not get adequate aeration, and reduces headroom in the coop.
Depth adjustment factors:
- More chickens per square foot: Maintain deeper bedding (10-12 inches) to handle higher waste volume
- Larger breeds: Heavier chickens compact bedding more; add fresh layers more frequently
- Bantams or small breeds: Can maintain shallower depth (6-8 inches) successfully
- High-moisture climate: Keep bedding deeper to provide more absorption capacity
The bedding will compress over time as composting progresses and chickens walk on it. What starts as 2 inches of fresh fluffy shavings may compress to 1 inch within a few weeks. This is normal and why you need to add fresh material regularly to maintain total depth.
Can You Use Deep Litter Method in Small Coops?
You can use the deep litter method in small coops, but it becomes more challenging and requires more careful management as coop size decreases. Coops smaller than 32 square feet (such as a 4×8 or 6×6 coop) can work with deep litter if you have adequate ventilation and maintain proper bird density.
Minimum requirements for small coops:
- At least 3-4 square feet per bird (more is better)
- Minimum one square foot of ventilation per 10 square feet of floor space
- Ability to maintain 6-8 inches of bedding depth without reducing headroom excessively
- Regular monitoring since problems develop faster in smaller spaces
Small coop challenges:
- Moisture and ammonia concentrate more quickly
- Less room for chickens to spread out if one area becomes wet
- Harder to maintain proper bedding depth without losing headroom
- Smaller volume of air means ventilation is more critical
- Less bedding volume means the composting ecosystem is less stable
Adaptations for small coops:
- Use a droppings board under roosts to catch overnight waste before it reaches the litter
- Add fresh bedding more frequently (weekly instead of every 2-4 weeks)
- Consider a hybrid approach: deep litter on the floor but clean the droppings board daily
- Do cleanouts more frequently (every 4-6 months instead of annually)
- Maximize ventilation with additional vents or small fans
When to skip deep litter in small coops: If your coop is under 16 square feet or houses more than one chicken per 3 square feet, regular cleaning with thin bedding (2-3 inches changed weekly) is more practical and safer. The space is simply too small to maintain the composting ecosystem effectively.
Mobile coops and tractors are generally not suitable for deep litter because they’re moved frequently and typically have limited ventilation and small footprints.
Common Mistakes with Deep Litter Method
New users of the deep litter method often make predictable mistakes that can cause the system to fail. Understanding these errors helps you avoid them and maintain a successful composting bedding system.
Top mistakes and how to avoid them:
1. Insufficient ventilation
- Mistake: Closing vents in winter to keep chickens warm
- Why it fails: Ammonia builds up, causing respiratory problems and odor
- Solution: Keep ventilation open year-round; chickens handle cold better than ammonia
2. Starting with wet or damp bedding
- Mistake: Adding bedding during humid weather or after rain
- Why it fails: Moisture prevents composting and promotes mold
- Solution: Store bedding in a dry location; only add completely dry material
3. Not adding fresh bedding frequently enough
- Mistake: Waiting until bedding looks completely soiled before adding more
- Why it fails: System becomes overwhelmed with waste before composting can keep up
- Solution: Add fresh layers when the top surface is 50-70% covered with droppings
4. Using the wrong bedding material
- Mistake: Using cedar shavings, hay, or sawdust alone
- Why it fails: Cedar is toxic, hay molds easily, sawdust compacts and doesn’t compost well
- Solution: Stick with pine or hemp shavings as your primary material
5. Inadequate coop space
- Mistake: Trying deep litter with less than 3 square feet per bird
- Why it fails: Overcrowding produces too much waste for the bedding to handle
- Solution: Reduce flock size or expand coop before attempting deep litter
6. Ignoring moisture problems
- Mistake: Not fixing leaky waterers or roof leaks promptly
- Why it fails: Continuous moisture input overwhelms the bedding’s absorption capacity
- Solution: Address water sources immediately and add extra dry bedding to wet areas
7. Expecting instant results
- Mistake: Giving up after a few weeks if the system isn’t perfect
- Why it fails: The composting ecosystem takes 2-3 months to fully establish
- Solution: Be patient and consistent with adding bedding and monitoring during the startup phase
8. Not encouraging scratching behavior
- Mistake: Assuming chickens will naturally turn the bedding enough
- Why it fails: Some flocks need motivation to scratch throughout the entire floor area
- Solution: Scatter scratch grains or treats daily to encourage thorough scratching and aeration
The most critical mistake is inadequate ventilation combined with too much moisture. This combination causes 90% of deep litter failures. If you get ventilation right and keep bedding dry, most other mistakes are recoverable.
When Should You Not Use Deep Litter Method?
The deep litter method isn’t suitable for every situation, and recognizing when to use alternative bedding management will save you time and prevent chicken health problems.
Situations where deep litter is not recommended:
Climate and environmental factors:
- Consistently humid climates (relative humidity over 70% year-round): Bedding stays too moist for proper composting
- Areas with very high rainfall and poor drainage around the coop
- Coops with dirt floors in wet climates where moisture wicks up from the ground
- Locations prone to flooding or standing water
Coop design limitations:
- Inadequate ventilation that can’t be improved (less than 1 sq ft per 10 sq ft of floor)
- Very small coops under 16 square feet total
- Low ceiling height where adding 8-10 inches of bedding would reduce headroom excessively
- Mobile coops or tractors that are moved frequently
Flock characteristics:
- Overcrowded conditions with less than 3 square feet per bird
- Very small flocks (1-2 chickens) where the composting ecosystem is too small to establish
- Chickens with existing respiratory issues until health problems are resolved
- Broody hens sitting on nests in the coop (heat from composting can affect egg viability)
Management constraints:
- Inability to monitor regularly (at least weekly checks)
- Limited access to bedding materials or high bedding costs in your area
- Physical limitations that make adding bedding or doing annual cleanouts difficult
- Rental properties where you can’t modify ventilation or coop structure
Temporary situations:
- During disease outbreaks: Switch to regular cleaning with disinfection until the flock is healthy
- When treating for parasites: Complete cleanout helps break parasite life cycles
- Integration of new birds: Some keepers prefer regular cleaning during quarantine and integration periods
Better alternatives in these situations:
- Sand bedding: Works well in humid climates and small coops; easy to rake clean daily
- Regular cleaning with thin bedding: Simple and effective for small flocks or limited space
- Droppings boards only: Minimal bedding on the floor with boards under roosts that are cleaned daily
- Wire or slatted floors: Appropriate for some climates and management styles (though less enriching for chickens)
If you’re unsure whether deep litter will work for your situation, try it during your easiest season (typically fall or winter in most climates) and be prepared to switch to regular cleaning if problems develop. There’s no shame in using a different method that works better for your specific circumstances.
Frequently Asked Questions
How long does it take to establish a deep litter system?
A deep litter system takes 2-3 months to fully establish. During this time, you’ll build the bedding depth from 3-4 inches to 6-8 inches while beneficial microorganisms colonize the material and begin active composting. The system is established when the bottom layers feel warm and have a dark, earthy appearance.
Can deep litter cause respiratory problems in chickens?
Deep litter itself doesn’t cause respiratory problems when managed correctly. However, inadequate ventilation leading to ammonia buildup or mold growth in wet bedding can cause respiratory issues. Proper ventilation and dry bedding prevent these problems, making deep litter as safe as any other bedding method.
Do I need to add anything to start the composting process?
No additives are necessary to start composting in a deep litter system. Chicken droppings naturally contain the bacteria and microorganisms needed for decomposition. However, some keepers add a shovelful of finished compost or garden soil to seed the system with beneficial microbes, which can speed up establishment slightly.
How do I know when it’s time for a complete cleanout?
It’s time for a cleanout when the bedding reaches 12+ inches deep, starts to smell strongly of ammonia despite adding fresh material, becomes compacted and difficult for chickens to scratch through, or when you want the finished compost for your garden (typically spring or fall).
Will deep litter attract rats or mice?
Deep litter doesn’t attract rodents more than any other chicken keeping method. Rodents are attracted to chicken feed, not bedding. Store feed in sealed containers, clean up spilled feed daily, and ensure your coop has no gaps larger than 1/4 inch where rodents can enter.
Can I use deep litter with a dirt floor?
You can use deep litter with a dirt floor in dry climates, but it’s challenging in areas with high rainfall or humidity. Moisture can wick up from the ground into the bedding, causing problems. If you have a dirt floor, add a thick base layer (6+ inches) of very absorbent material like pine shavings and monitor moisture carefully.
Does deep litter increase parasite problems?
Research shows that properly managed deep litter doesn’t increase parasite loads compared to regularly cleaned coops. The composting process and beneficial organisms in the bedding may actually help control some parasites. Maintain your regular parasite prevention routine regardless of bedding method.
How much does deep litter bedding cost per year?
For an 8×8 foot coop (64 square feet) with 6-8 chickens, expect to spend $60-100 per year on bedding for deep litter. This includes the initial setup and regular additions. This is typically 30-50% less than regular cleaning methods because material stays in the coop longer and you’re not replacing it frequently.
Can I use deep litter in a coop with a wire floor?
No, deep litter requires a solid floor (wood, concrete, or dirt) to contain the bedding material. Wire floors are designed for droppings to fall through, which is the opposite approach from deep litter composting.
What should I do with the bedding when I clean out the coop?
The removed bedding is fully composted and can be used directly in your garden as a soil amendment. Spread it around plants, mix it into garden beds, or add it to your compost pile. It’s rich in nitrogen and beneficial microorganisms. A typical cleanout yields 15-25 cubic feet of finished compost.
Can I start deep litter in summer?
You can start deep litter in summer, but fall or winter is easier in most climates. Summer’s higher humidity and heat make moisture management more challenging during the establishment phase. If starting in summer, be extra vigilant about ventilation and adding dry bedding promptly.
How do I prevent the coop from smelling like ammonia?
Prevent ammonia smell by ensuring adequate ventilation (at least 1 square foot of ventilation per 10 square feet of floor space), adding fresh dry bedding every 2-4 weeks, fixing any water leaks immediately, and maintaining proper bedding depth. If you smell ammonia, add fresh bedding and increase ventilation right away.
Conclusion
The deep litter method offers chicken keepers a low-maintenance, cost-effective bedding system that mimics natural composting processes while providing warmth, enrichment, and valuable garden compost. When managed with proper ventilation, appropriate bedding materials, and regular monitoring, this method reduces cleaning frequency to just once or twice per year while keeping chickens healthy and comfortable.
Success with deep litter depends on three critical factors: adequate ventilation to prevent ammonia buildup, maintaining dry bedding by addressing moisture sources promptly, and adding fresh layers regularly before the top surface becomes completely saturated with droppings. The system works best in coops with at least 3-4 square feet per bird and good airflow, though it can be adapted to various situations with proper management.
Take these next steps to implement deep litter successfully:
- Assess your coop: Verify you have adequate ventilation and space before starting
- Choose your bedding: Purchase pine or hemp shavings in bulk to reduce costs
- Start during your easiest season: Fall or early winter in most climates
- Monitor closely during establishment: Check weekly for moisture, odor, and bedding depth during the first 2-3 months
- Be patient: Give the composting ecosystem time to develop before judging success
Remember that deep litter isn’t the only good bedding method, and it’s perfectly fine to use regular cleaning if that works better for your situation. The best bedding system is the one you can maintain consistently while keeping your chickens healthy and comfortable. Whether you choose deep litter, regular cleaning, or a hybrid approach, understanding how the composting process works will help you make informed decisions about managing your coop environment.


